Bamboo Fly Rod Building
VARNISHING FLY ROD
Varnishing bamboo fly rod
EXCERPTS CHAPTER XI
This is the last operation, the one that, after the fashion of the artist, will at least allow you to see the finished product; ready to be assembled and ready to serve you.
You will consider the length of the journey, the time spent, the alerts and sometimes the panic.
Nevertheless the rod is there before you at last! The only moment that can be compared with this is without doubt, the moment when the pieces appear when sanded, after the assembly and the cementing.
THE VARNISHING PROCESSES
"Drop" varnishing
Regarding the varnishing, I now only use one method and this is "The drop one". I think that this is the one that gives the best results when it comes to the final appearance of the rod and it is the easiest once you have learnt the trick. The process is very simple regarding the principle but trickier when it comes to bringing it into operation.
The method is to put a drop of varnish at the top of the piece to be varnished and by rotating the slightly tilted piece, spread it evenly around it, gradually coming down the entire bound section.
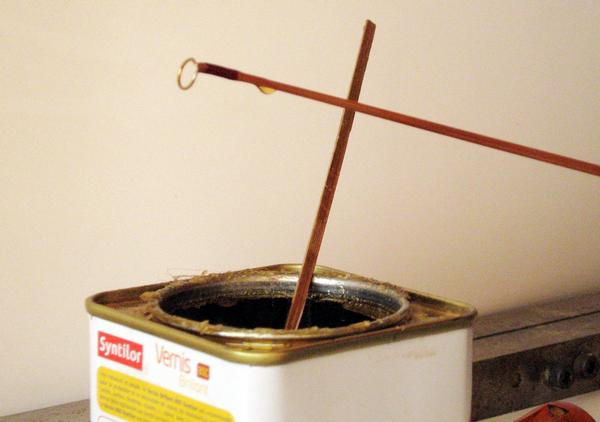
I use polyurethane varnishes, which are retailed in 25cl. pots in the hardware stores (Photo 11-1).

11.1 During the varnishing. Note the small stick,
which serves to put on the varnish.
(...)
The varnishes for models are also suitable provided you support them in a stand in order to avoid them spilling.
However I prefer the 25cl. pots as they have a large aperture so that the drops that don't adhere to the piece will not spread sideways.
For the rods that could stand big shocks, you can use two-component car painter's varnish although their storing life is very short.
A big feature of the polyurethane varnishes is that you can sand them (800 grit water sand paper) in as little as 24 hours after applying. This allows correcting the tiniest defect and making it disappear.
(…)

Bamboo fly rod building ©2010


